Overview
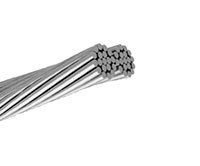
ACSR/TP overhead conductor consists of two standard concentric stranded ACSR conductors twisted around each other. It may be installed using techniques and equipment similar to that used to install other concentric round wire conductors. However, a few special procedures must be used to maintain equal tension between the two component conductors. The equipment recommendations and special procedures in this guide along with recommendations given in IEEE Std. 524, “Guide to the Installation of overhead Transmission Line Conductors”, should be followed.
Handling
It is important to maintain the relationship of the conductor lengths established during manufacturing. Therefore, ACSR/TP conductor should not be rewound in the field from the shipping reel to another reel. Reels containing ACSR/TP conductor should be stored upright, resting on the rims. Never lay the reel on its side.
Tensioners & Sheaves
Most methods of installation used for standard round conductor can be used to install ACSR/TP conductor. However, non-tension methods of stringing are preferred such as laying the conductor out on the ground and then lifting it into position on the poles.
If the conductor must be strung under tension then a multi-groove bull wheel tensioner MUST be used to install ACSR/TP conductor. A tensioner in which the alignment of the front and back bull wheels are offset by ½ the groove spacing is satisfactory for installing smaller sizes of ACSR/TP conductor, where the conductor will lay flat in the bottom on the groove. If improper equipment is used, the ridge between the grooves may separate the individual ACSR/TP conductors.
Another commonly used tensioner has one bull wheel tilted slightly in relation to the other. This allows the conductor to ride in the bottom of the grooves. This type of tensioner, when properly sized, is preferred.
The bottom groove diameters for sheaves and bull wheels should be sized in accordance with IEEE Std. 524; except that the bottom groove for sheaves should not be less than 14 times the maximum diameter of the ACSR/TP conductor. Note that for this type of conductor the term “Dc” should be twice the diameter of one component conductor (referred to in this guide as the ‘maximum diameter’).
The groove radius of the sheave and bull wheel must be wide enough to allow the ACSR/ TP conductor to pass through with the two individual conductors laying flat and parallel. The minimum groove radius should be 0.55 times the maximum diameter of the ACSR/ TP conductor. The use of smaller than recommended diameter sheaves and/or high stringing tensions may cause a build-up of torsional stress into the conductor.
Stringing
Each shipping length of ACSR/TP conductor has three metal bands applied at the factory around both conductors, one band at each end and one approximately 10 feet from the leading end. It is recommended that these bands not be removed for the stringing procedure, however, if the gripping device cannot be applied, then it is acceptable to remove the outer band only leaving the second band in place a few feet further up the conductor. These bands will help maintain the individual conductor length relationship when splicing and dead ending.
A single woven wire grip sized to fit over both conductors and a swivel link should be used for tension stringing. Double band the open end of the grip to prevent it from accidentally coming off. Apply tape over the bands to protect the stringing sheave surface.
Tensioning
ACSR/TP conductor should be tensioned by placing a separate grip on each component conductor. The two grips are connected through a snatch block with a sling. Tension is applied to the snatch block with a hoist or other appropriate tensioning device. This arrangement will apply even tension to the component conductors.
Splicing
ACSR/TP conductors are normally joined by separately splicing each component conductor. Where possible, the individual conductor splices should be staggered about 5 feet. An additional twist may be needed before the second splice is made to remove any looseness between the individual conductors. This will ensure that each component conductor carries an even share of line tension. Both splices must be made before tension is applied.
Repairs
Repairs to a damaged component conductor can be made using the following procedure:
- Attach two wire grips facing each other approximately 15 feet apart on the undamaged component conductors.
- Attach a hoist to the grips and take up tension. As the tension increases, slack will appear in the damaged conductor.
- Increase tension until there is enough slack to make the repairs.
If it is necessary to cut the damaged conductor to install a splice, a second set of grips and hoist must be installed on the damaged conductor before it is cut. The above procedure should be followed to install the grips.
Helically applied rods may also be used for repairs in accordance with normal utility practice given the nature and severity of damage. Follow the above procedures to install the repair rods on the damaged conductor.


